On this page
As an agency managing social media, you’re familiar with the “press and hold” step in the Instagram approval process.You know, the one where you press send, then hold your breath for what feels like a million years before a reply lands in your inbox?Will the client want a thousand edits? Will they love the whole lot? At that moment, you just don't know.But what you do know is that if the client wants rounds of edits, an easy-to-implement Instagram approval process is paramount.Sourcing images, crafting captions, researching hashtags and more. There’s so much that goes into delivering as a social media manager. But no matter how much time, effort and research you put into a social media plan, sometimes changes are inevitable.Here we’ll run you through exactly how to make the Instagram approval process a seamless and easy procedure for your agency.
What You’ll Learn
- Key pointers leading agencies use to simplify their Instagram approval process
- How to manage collaboration and Instagram approval process via Google Docs
- How to use Sked Social’s Collab feature to collaborate easily
- Final Thoughts
Key pointers leading agencies use to simplify their Instagram approval process
It’s a good idea to have a strong Instagram content review process in place. It’s a better idea to have your entire social media planning process down to a tee.And as a social media manager or agency, completing tasks as seamlessly as possible is key.Here are our top tips for a smooth social media planning and reviewing process.
Share an Onboarding Welcome Kit
By sharing a Welcome Kit with your client, you’ll be able to communicate exactly what’s expected of them, and what’s expected of you from the get-go.Within this document, we recommend outlining areas of your contract in a more user-friendly language. For example, your Welcome Kit could include:
- How many posts per week you’ll be publishing
- Which platform/s you’ll be posting to
- Whether engagement and stories are included in the service
- If engagement and stories aren’t part of your service, include a guide for the client to follow
Have your client sign this and return it to you, so you’re not caught out down the track.
Limit Your Revisions
If you’ve ever had a client who insisted on having rounds of edits in the double figures, you’ll know how important revision limits truly are.By limiting your revision rounds (1-2 rounds is industry standard), your client will be more likely to submit all their edits in one hit. This will end up saving you loads of time and backwards-and-forwards hoo-ha.
Set Due Dates
The beauty of scheduling social media posts ahead of time is that you can remain organised and avoid the last minute scramble.Communicate your due dates with your clients. These could be things like, when:
- The client’s images for the month are due
- Your grid creation and caption copywriting is due
- The first round of revisions is due
- Your revised posts are due
- Final versions of posts are scheduled
Laying down these foundations will pay off in the long run and result in a more well-organised system for your agency and your client.So, once you’ve got these initial steps sorted, where will the Instagram approval process take place? Here are our two favourite ways to manage the social media posting process.
How to manage collaboration and Instagram approval process via Google Docs or Sheets
If your agency isn’t on Google Suite yet, you should be.Google Docs and Sheets are one of the most commonly used tools to collaborate on Instagram content with clients, team members and anyone else you’d like involved in the process.Comments, suggestions and edits can all be made right within the document. This makes Google Docs and Sheets worth considering to host your Instagram approval process.However, keep in mind that if comments and suggestions are approved, they will disappear from the document altogether. Then it is a lengthy process to go back through previous versions of the document to recover them.
Imagery
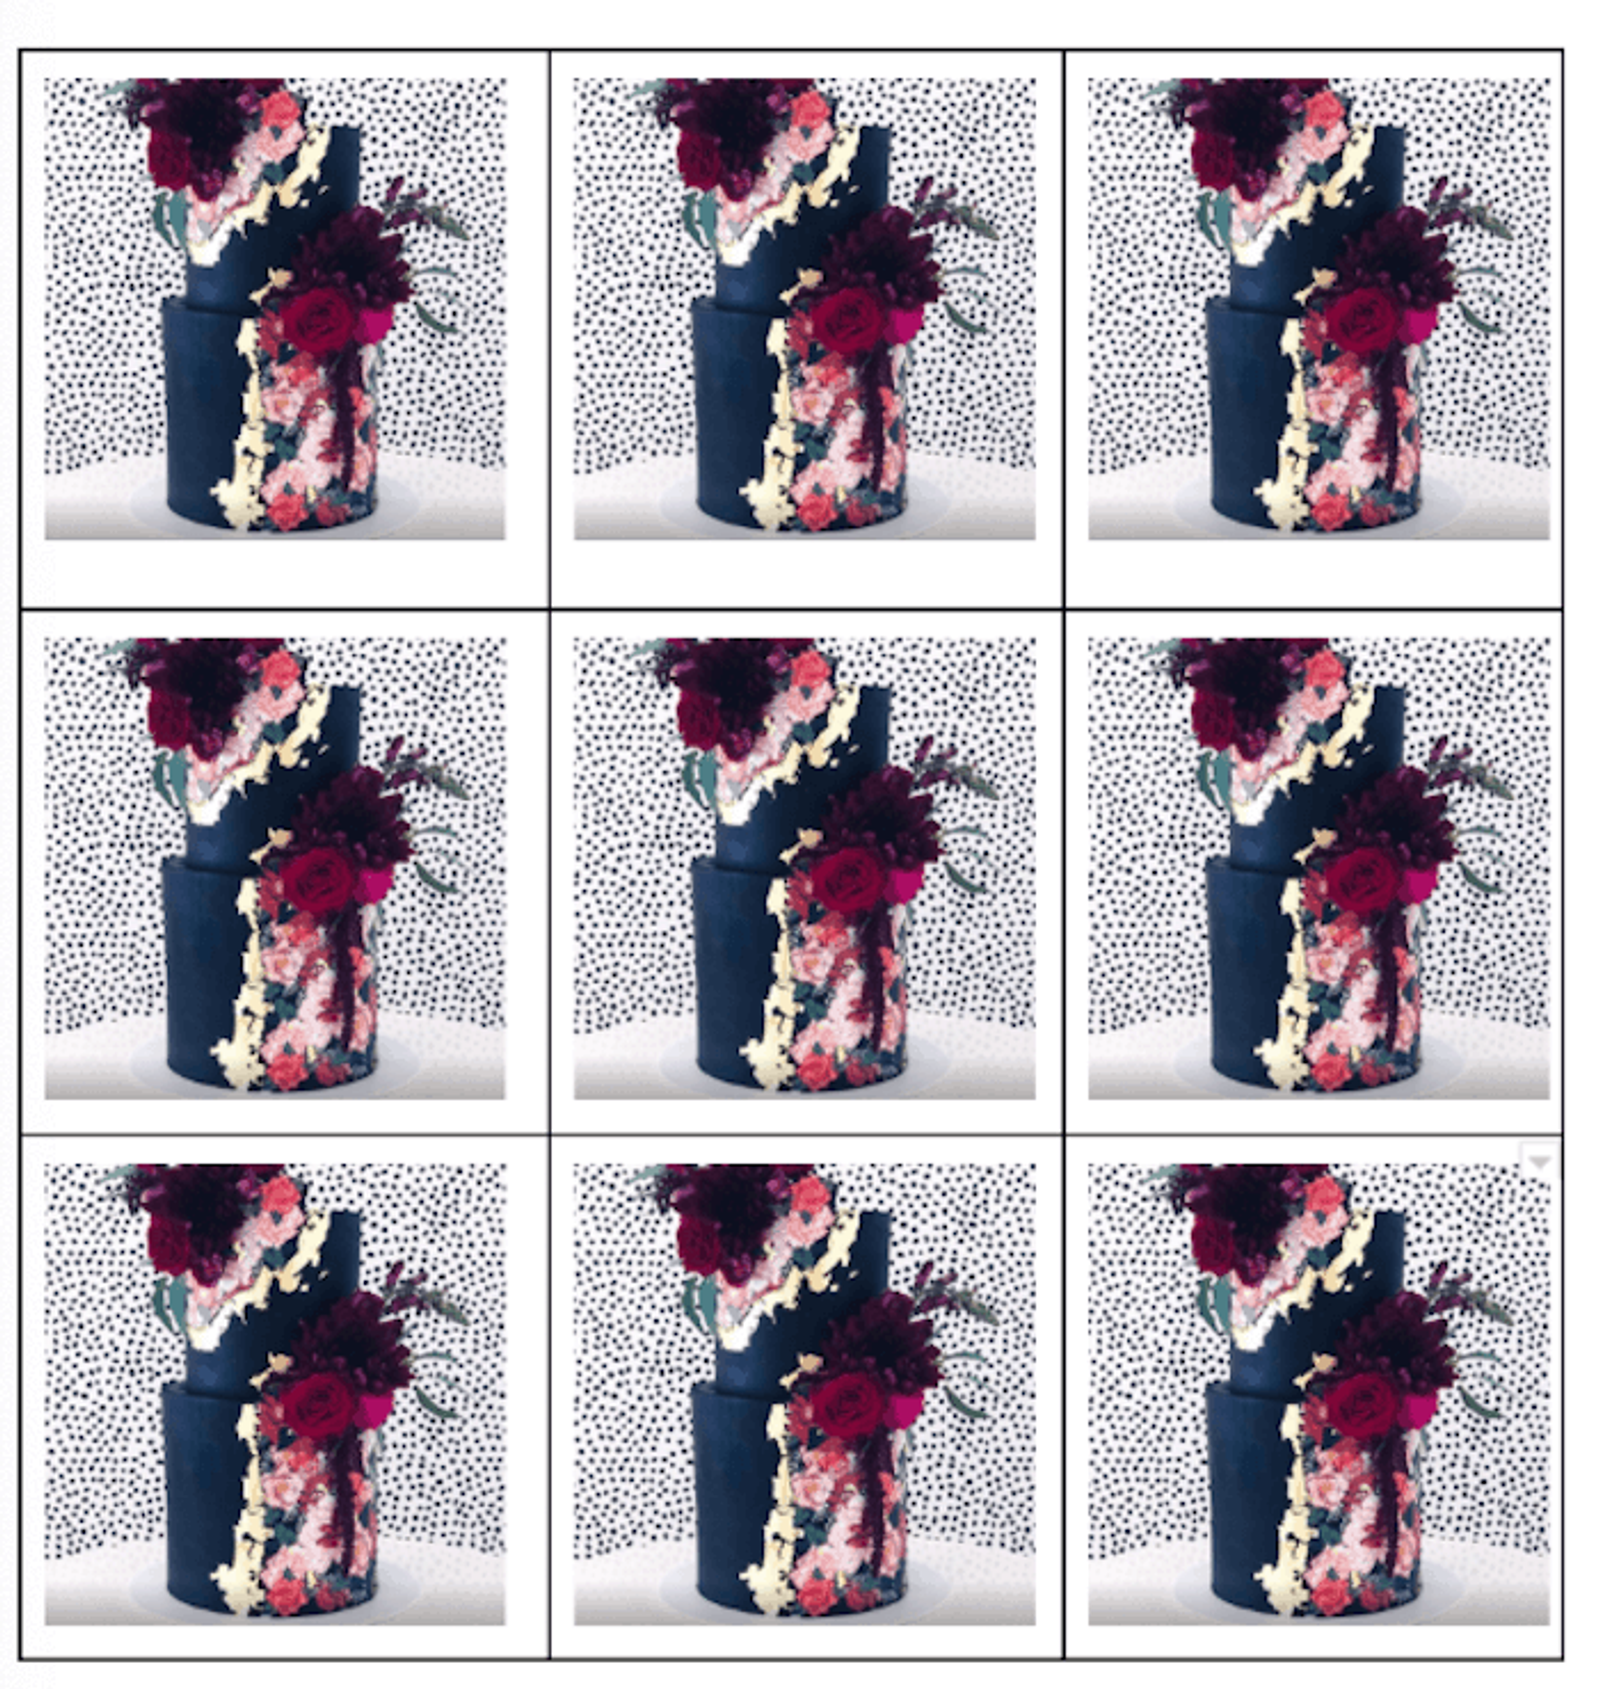
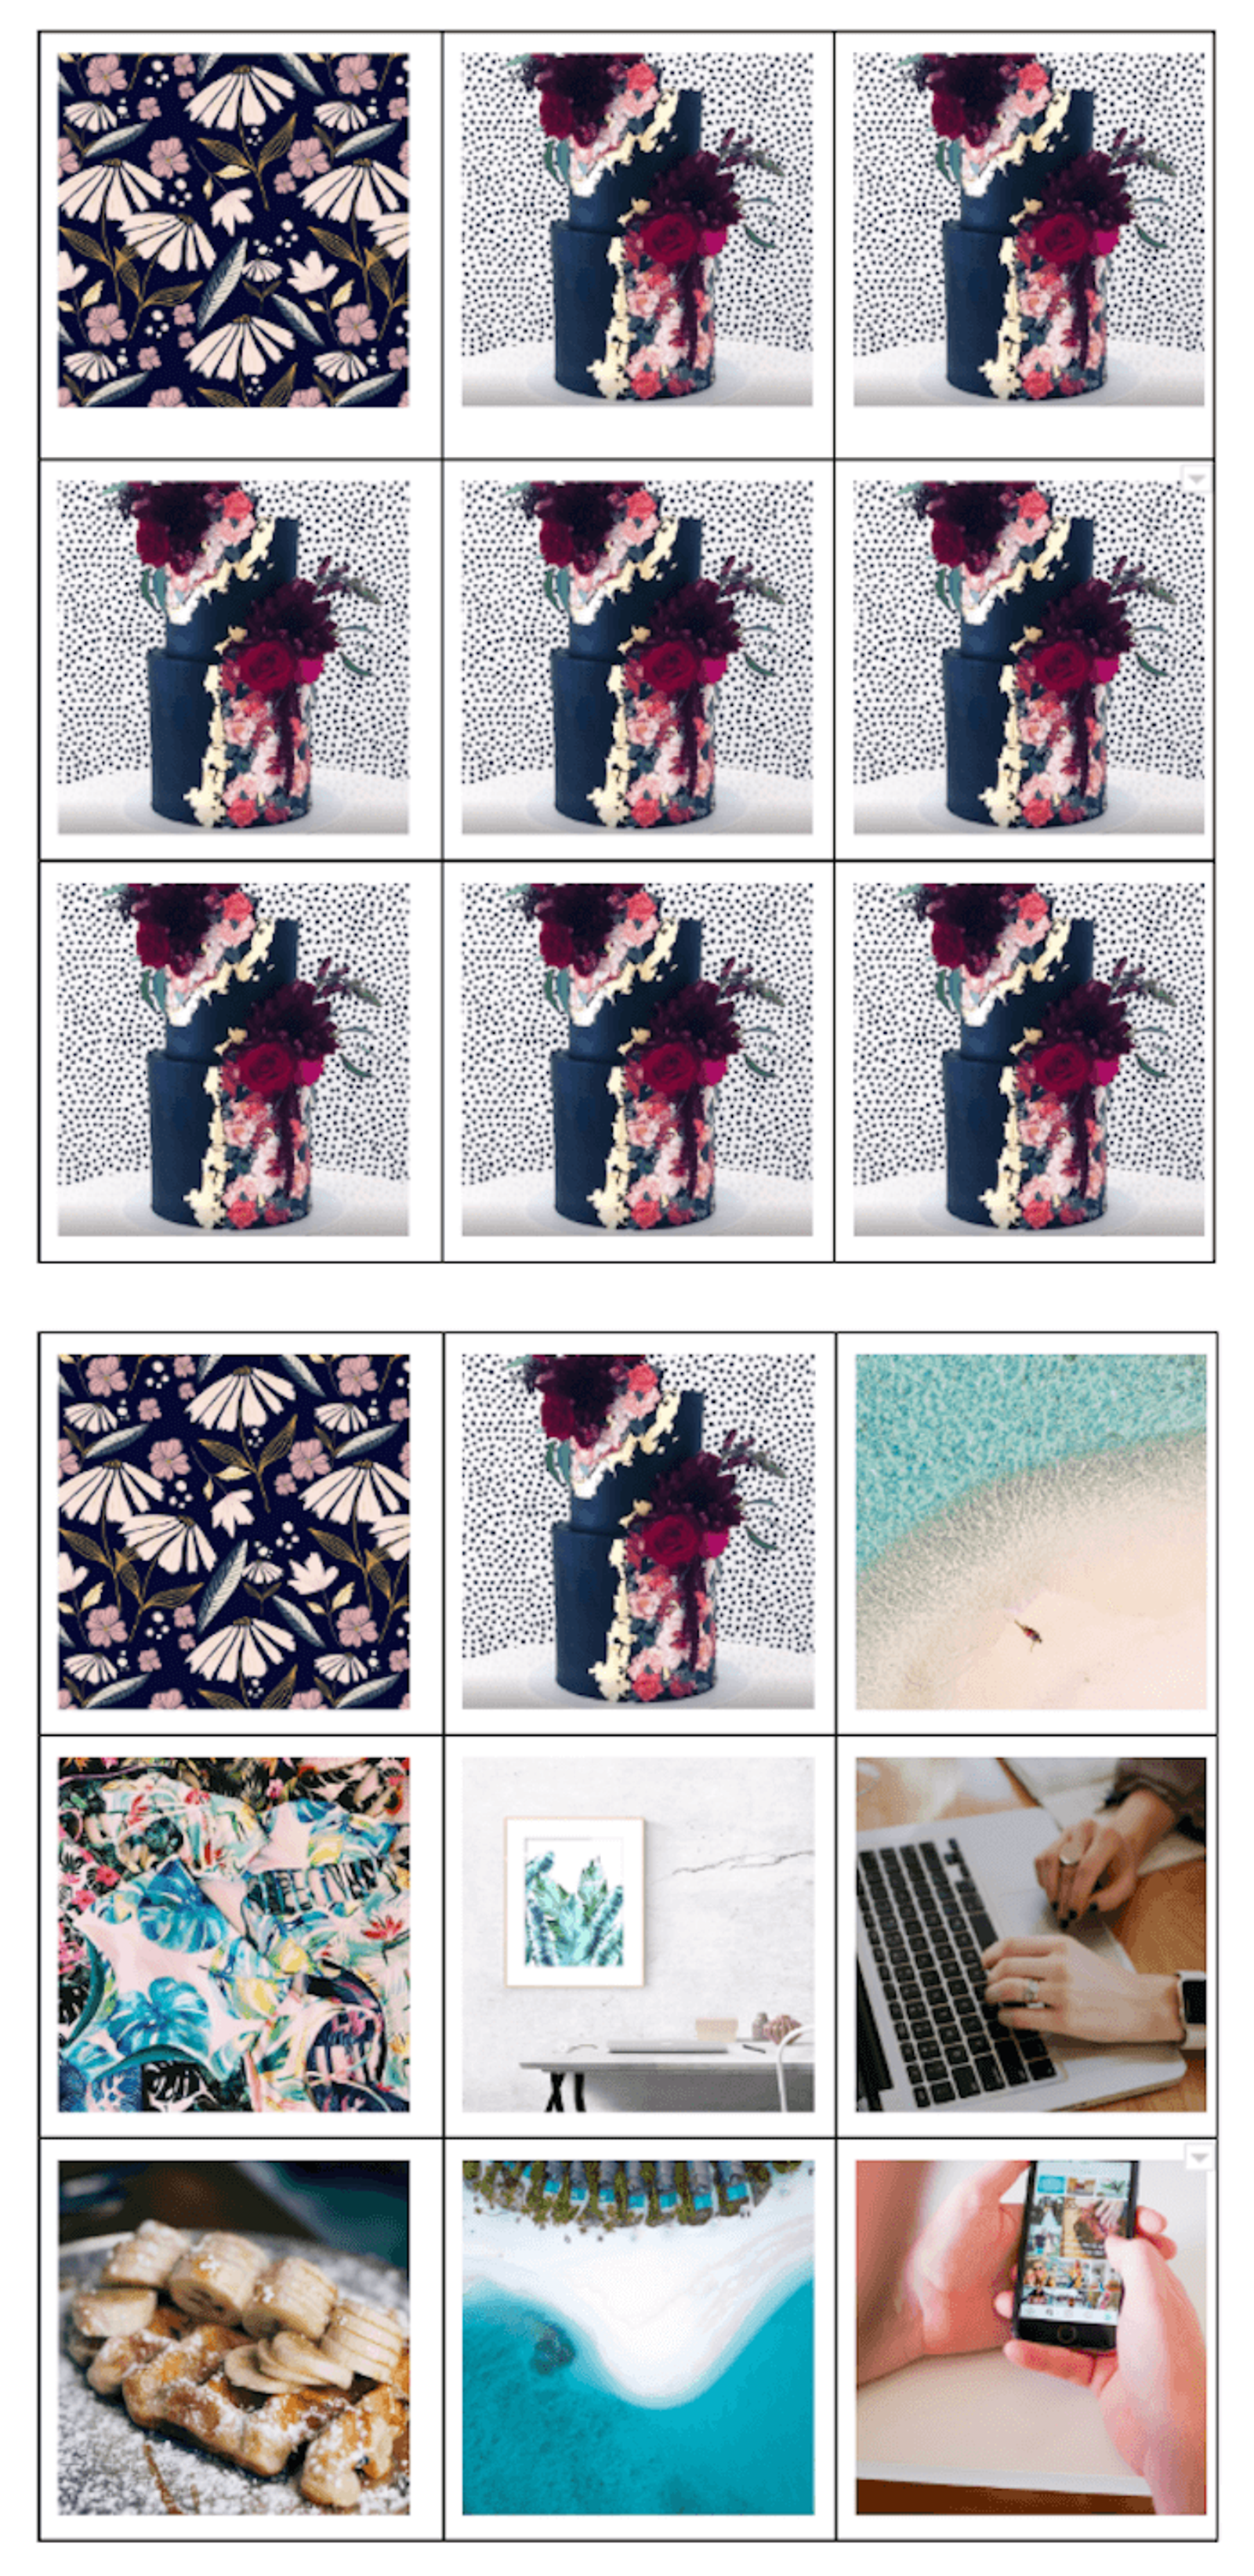
If your client likes to approve their grid layout before matching captions with imagery, simply create a table within Google Docs. To replicate Instagram’s grid layout, make your table three rows wide.

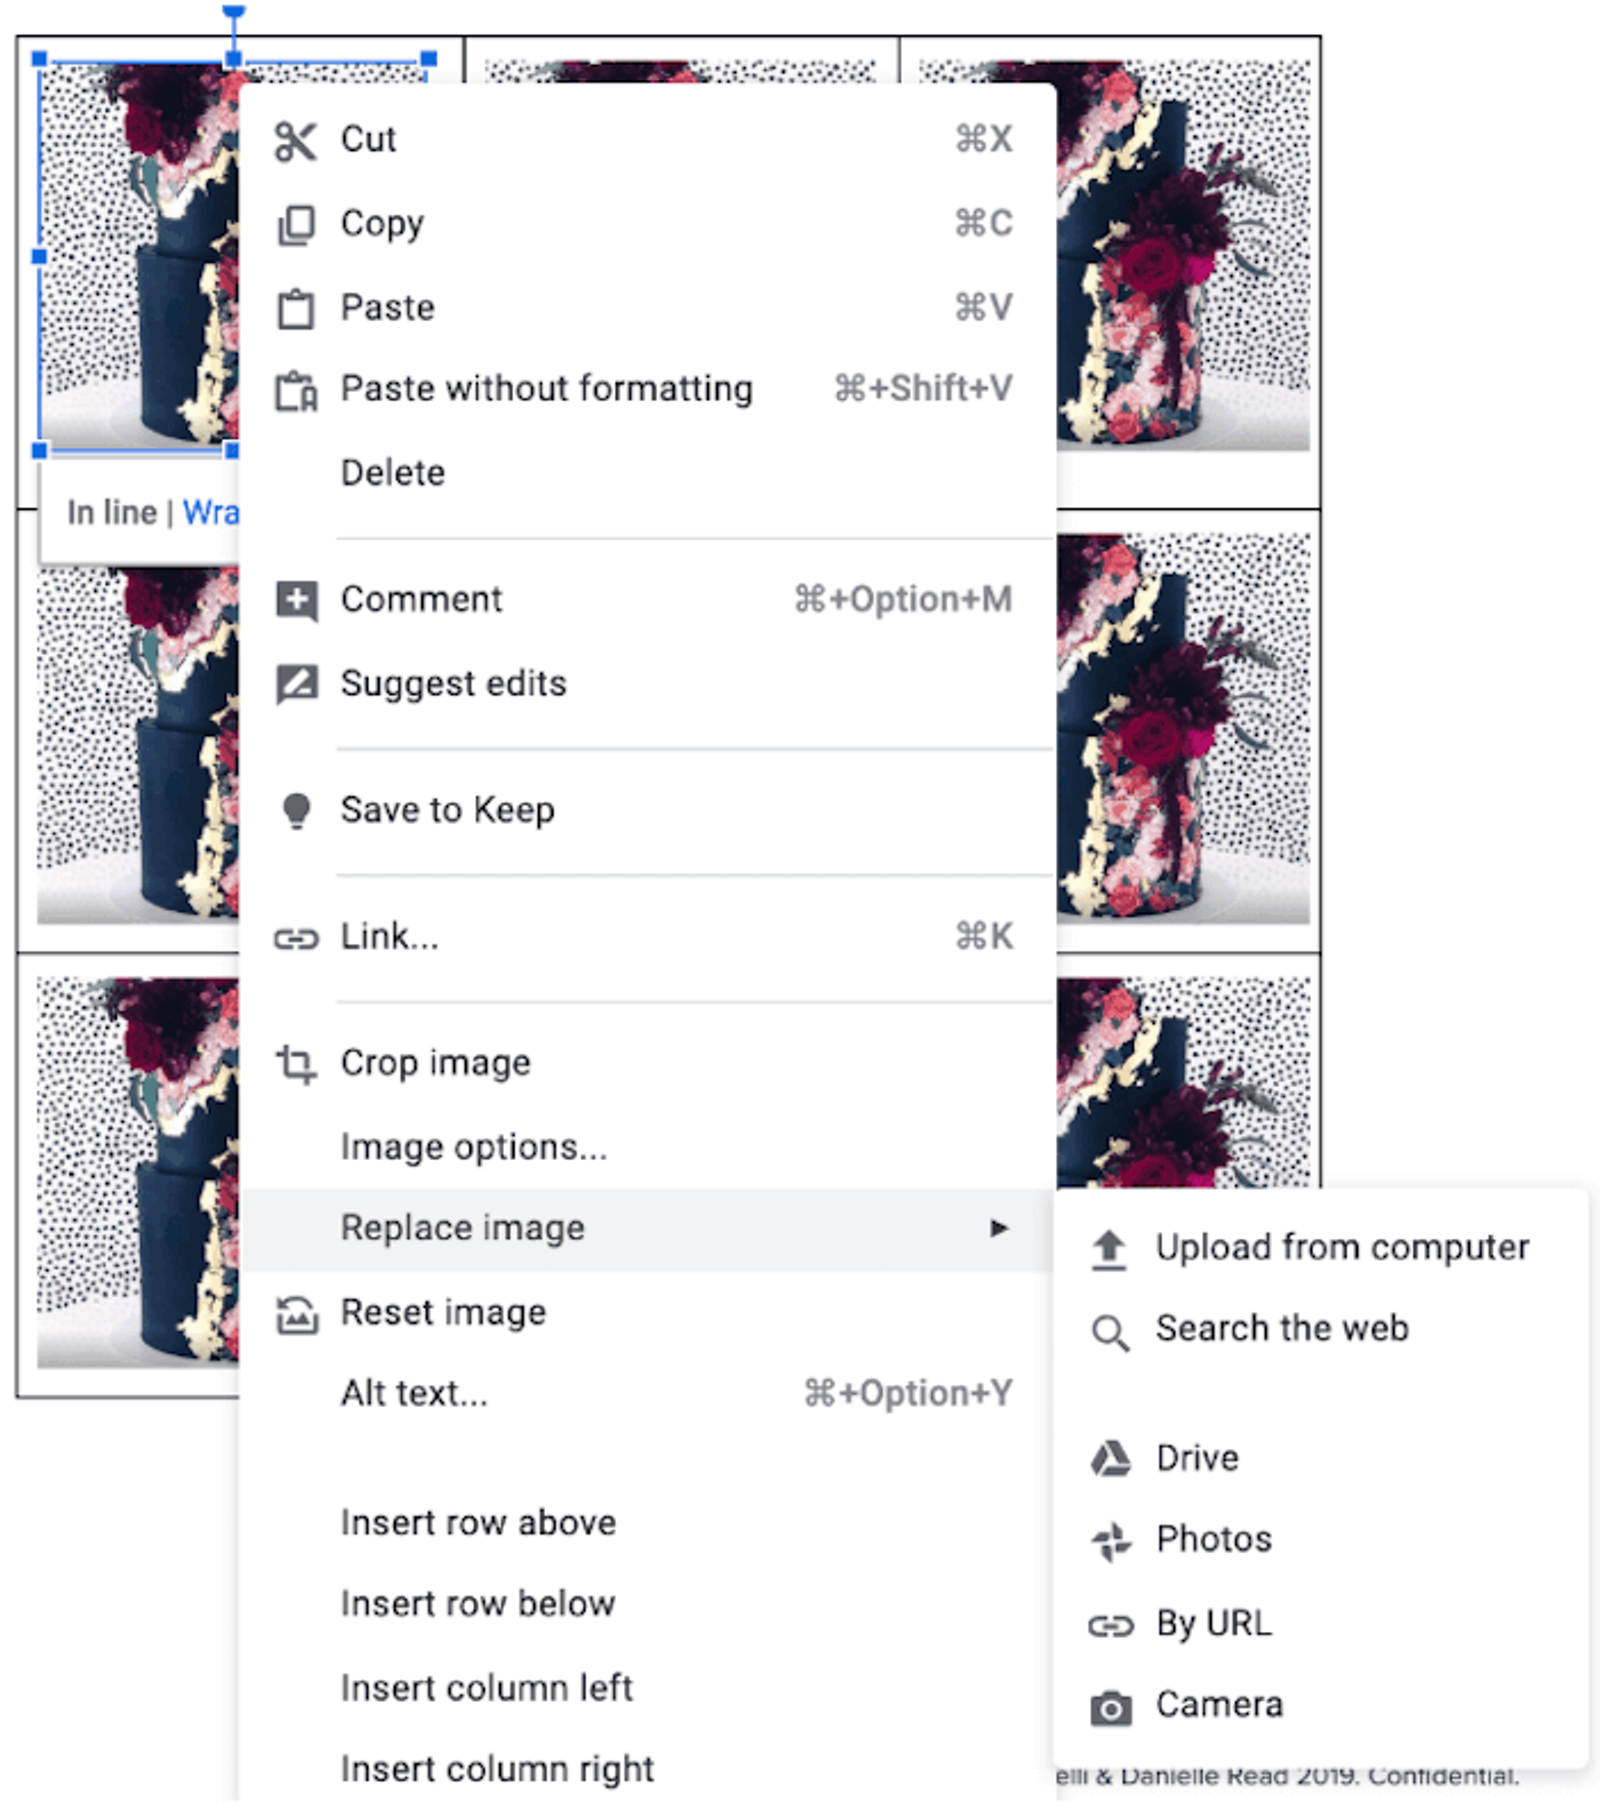
Next, insert an image by selecting ‘insert,’ ‘image.’ To replicate the same sized image, simply select and copy each image by clicking ‘command’ ‘C.’ Once images have been replicated, you can right-click on one, then select ‘replace image’ to keep the same dimensions.
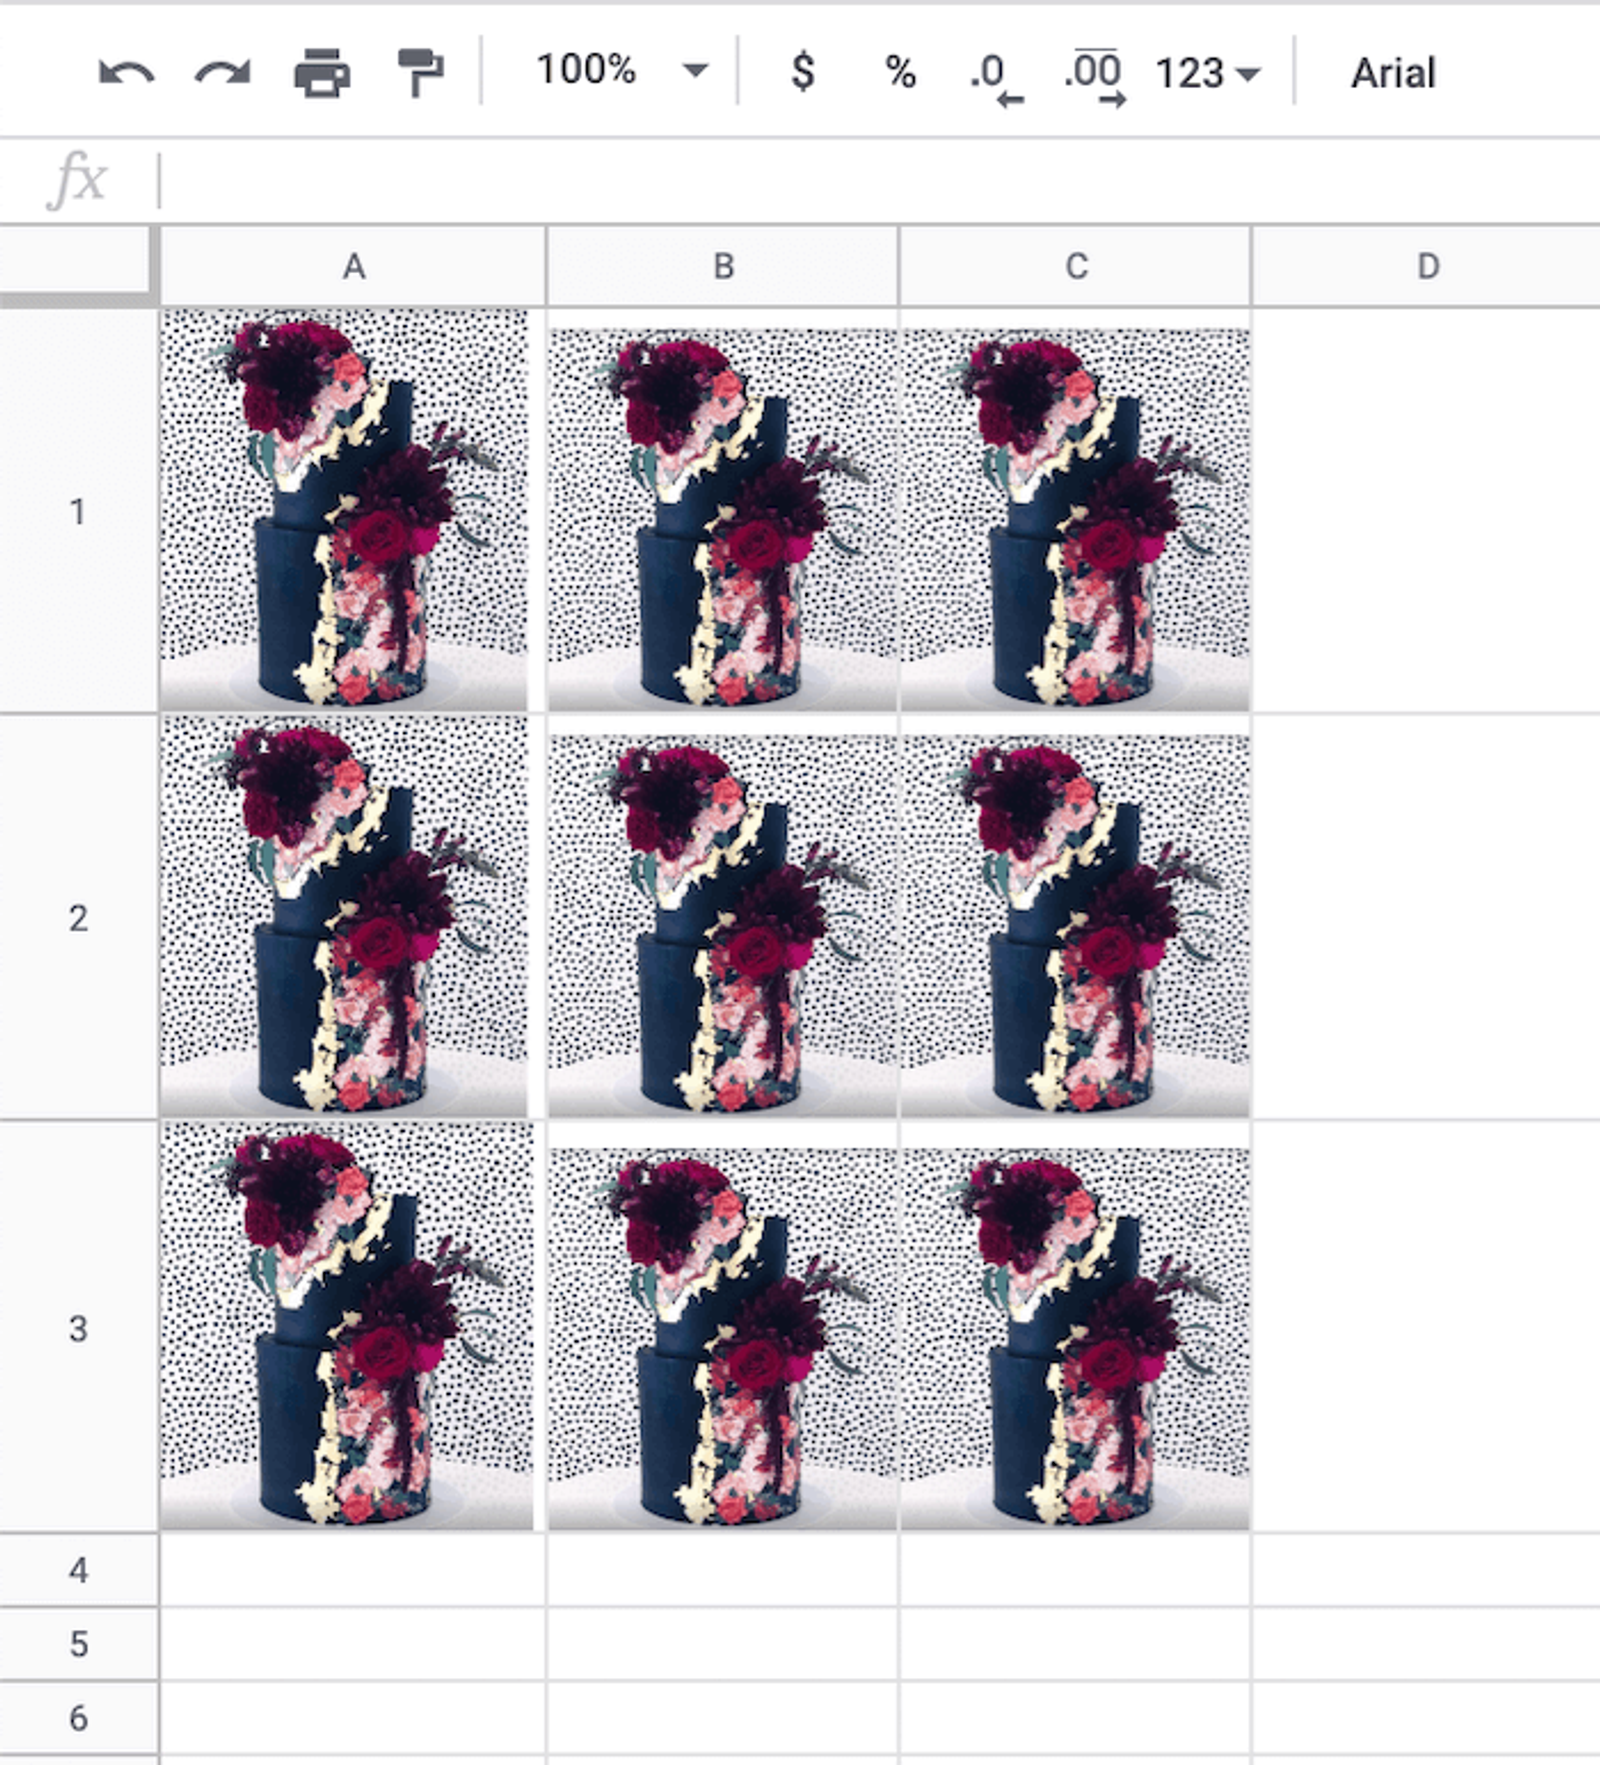
To plan Instagram content in Google Sheets, simply paste images into table cells.
Captions
Once your images have been approved, it’s time to match up your captions.Within Google Docs, you can create another table to outline your:
- Date
- Posting Strategy
- Any caption process you currently follow
Repeat this process for each post you’ll be publishing. Then, clients can comment, suggest and revise within the document for your final look over, before scheduling.
Within Google Sheets, write captions within the corresponding cells. Then, once all content has been approved, upload posts individually to Instagram, or in bulk to a social media scheduler like Sked.

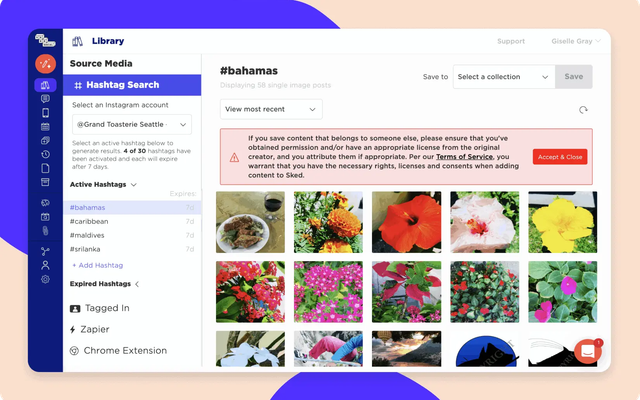
How to use Sked Social’s Collab feature to collaborate easily
Sked Social has been specially designed for social media strategists at agencies. Because of this, in-built features like internal collaboration and external review links make it easy to work with teams and clients.Sked’s collaboration feature allows users to:
- Build an easy approval workflow and gather feedback on social media content
- Collaborate with teams and clients
- Collaborate with people who don’t have Sked Social accounts through an external approval URL
- Comment on posts in the review stage
To easily manage the Instagram approval process with clients, simply create a new review link for each client.
Get Instagram Images and Captions Ready
Simply upload your images from:
- Your computer
- Dropbox
- Google Drive
- Instagram URL
- Canva
You can upload:
- Single images
- Multiple images/Carousel Posts
- Instagram Stories
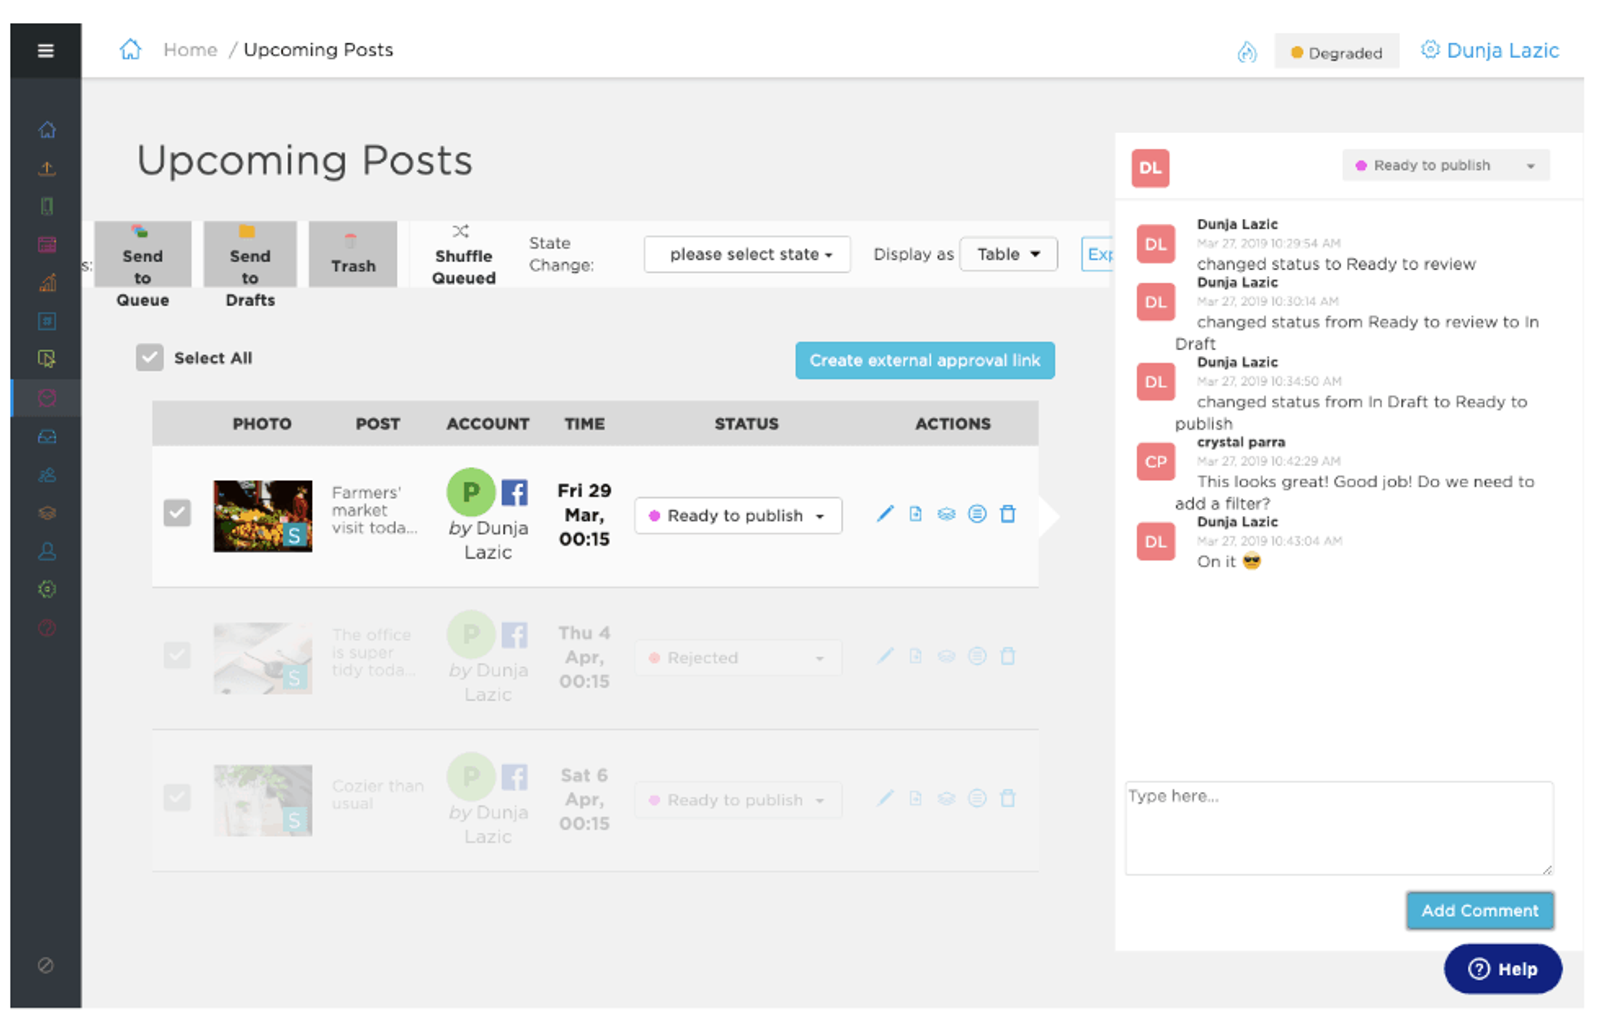
Your client can also preview the overall grid in a separate screen. Once a post is ready for review, update its status and notify your client.You’ll notice under each of the images below, a different ‘status’ has been selected. In this case, they’re ‘ready to review,’ ‘in draft’ and ‘ready to publish.’
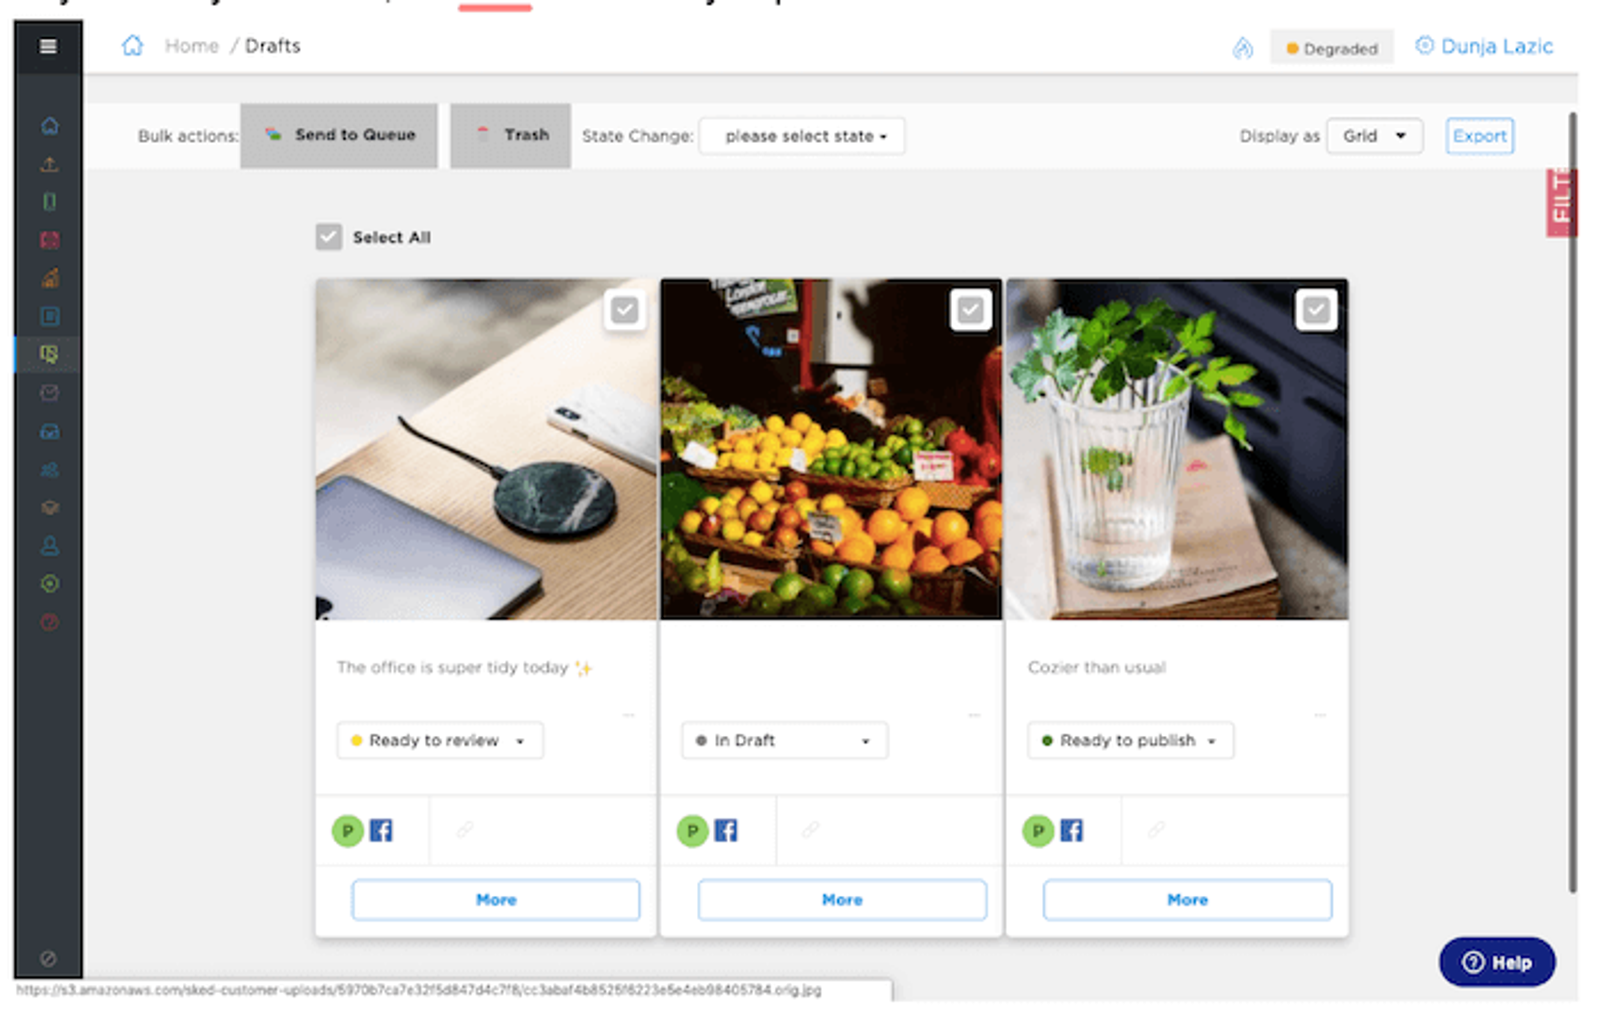
Post statuses can be changed from the drop-down menu at the top of the screen, labelled ‘State Change.’
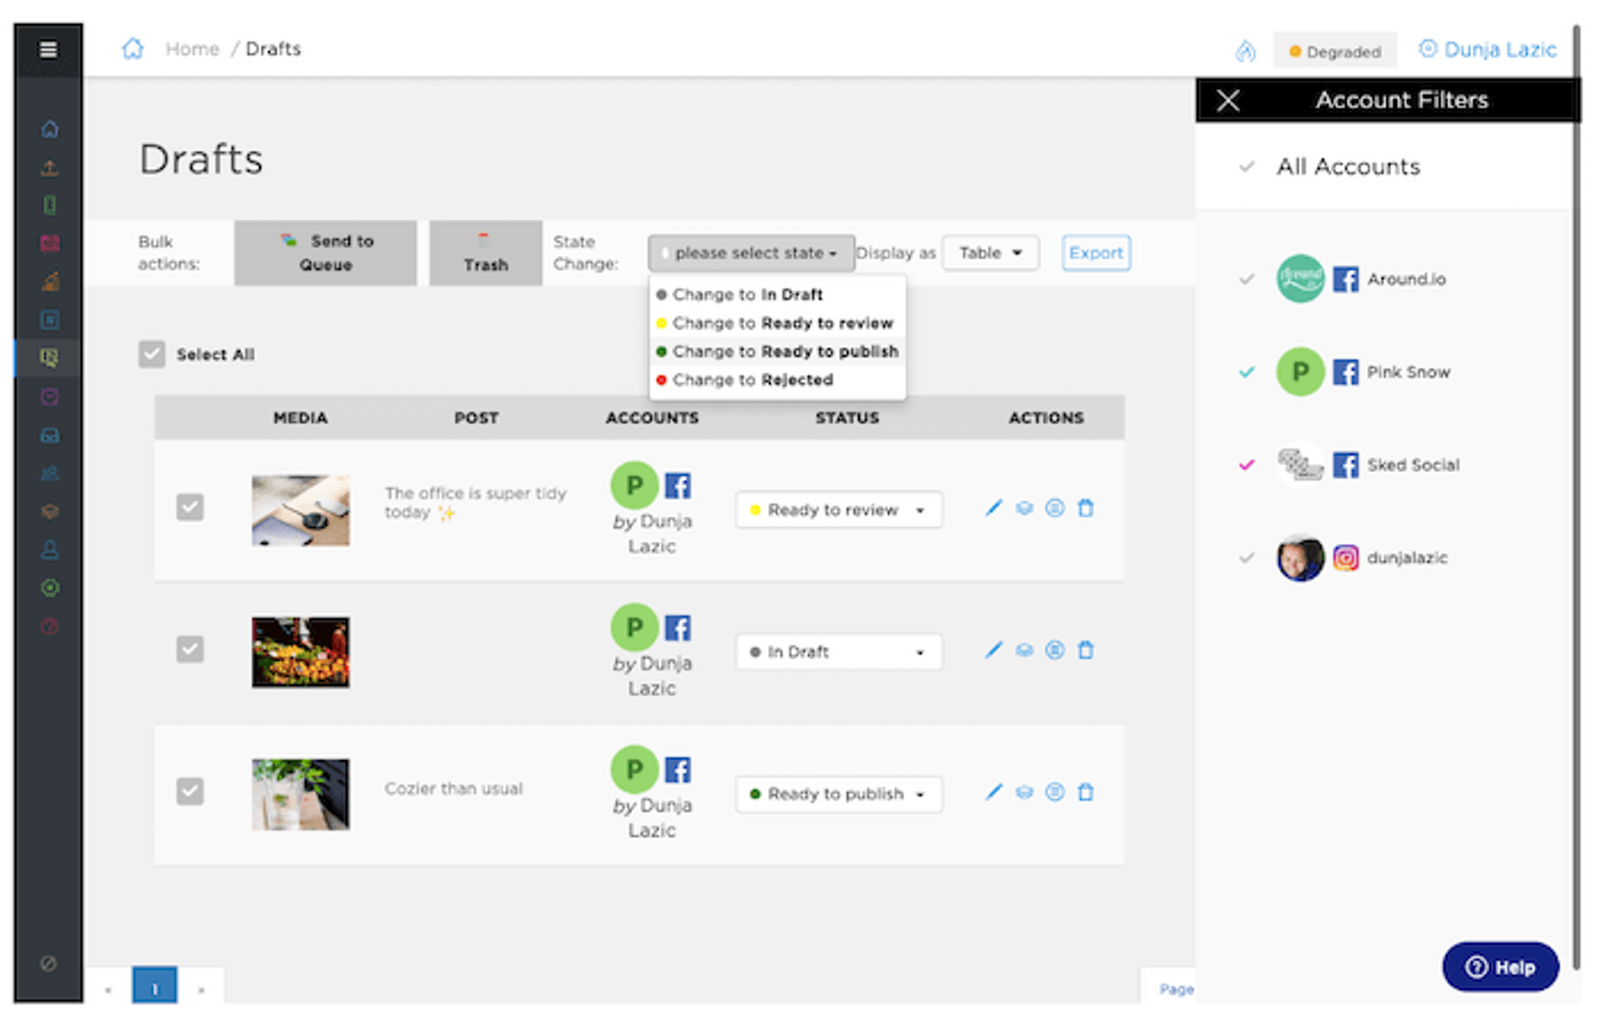
Clients can make comments directly on the post for your team to action. Your team and your clients are also able to share a URL to people who don’t have Sked Social accounts to make comments too.
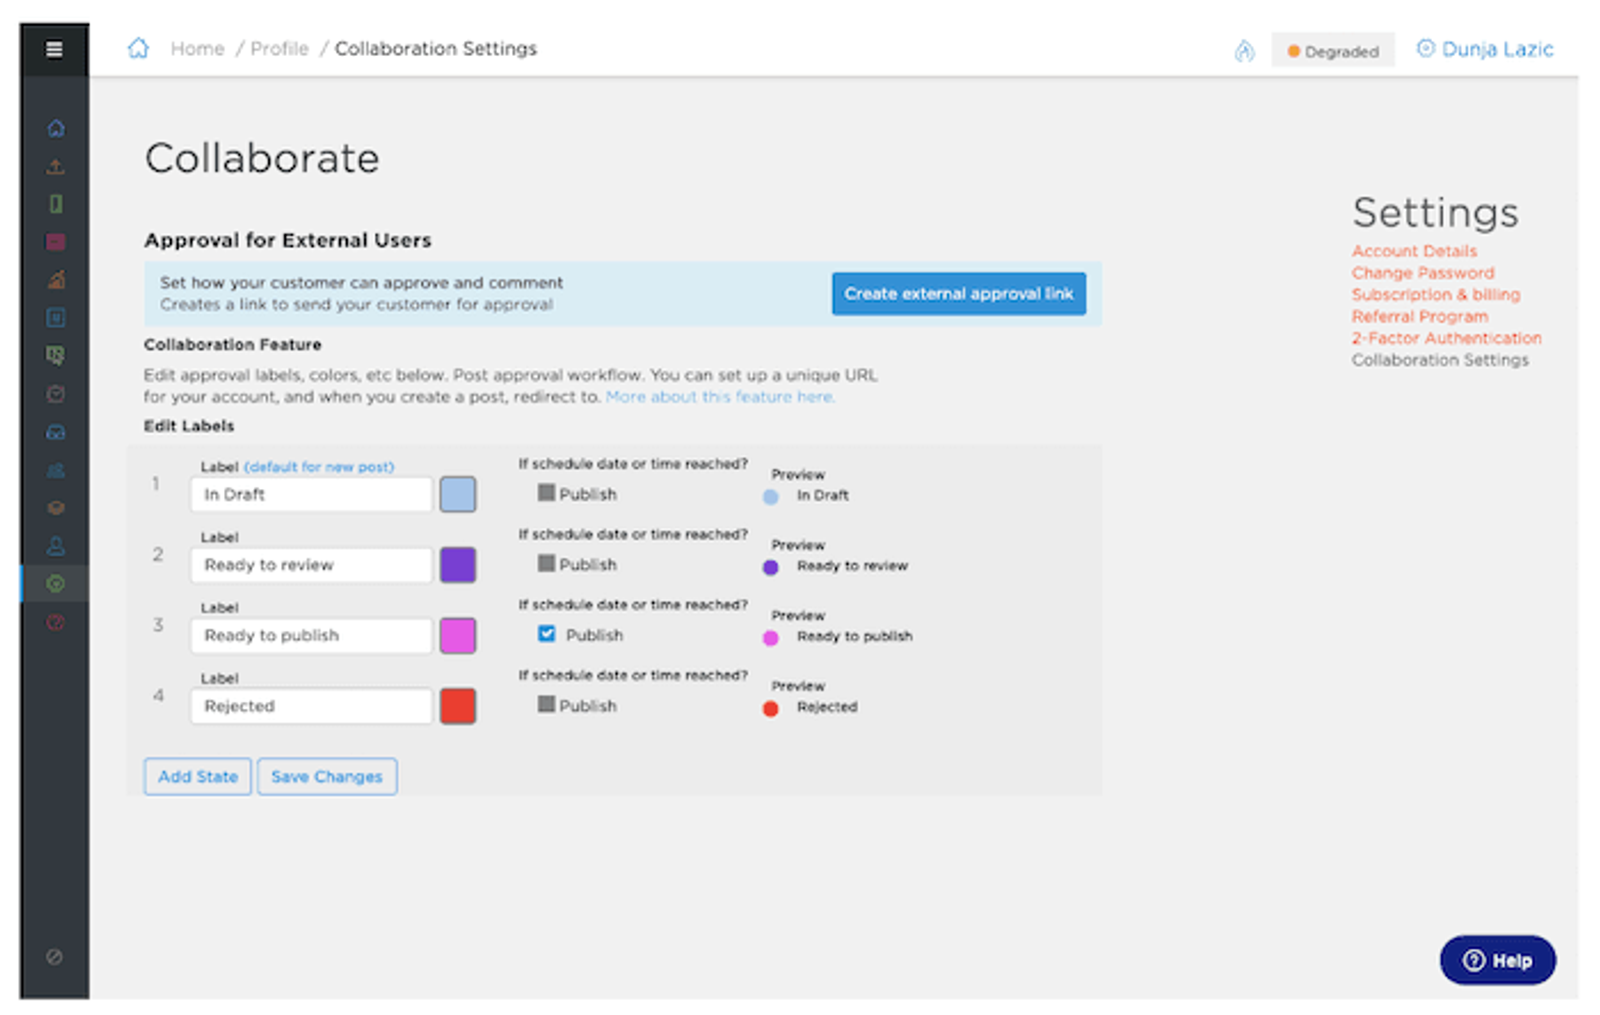
Tailoring your Instagram Approval Process to your Exact Needs
With Sked Social’s Collaboration feature, you can tailor your workflow to suit exactly what you’re looking for.Customise labels, colours and triggers to align with different statuses for each post.This means that your entire Instagram approval process can flow just the way you want, while also automating elements like publishing.
Final Thoughts
Planning social media in advance is a great way to create consistently good content. But content approvals can quickly become time-sucks.Finding the right content planning, Instagram approval process and social media scheduler will save you time, energy and headaches! To get access to our collaboration features, sign up for the Agency & Enterprise plan on Sked. Our all-in-one Instagram scheduler allows you to automatically post images, carousels, Stories, videos and more. Tag locations, users and products and manage all your hashtags in one place to save 5+ hours every week.